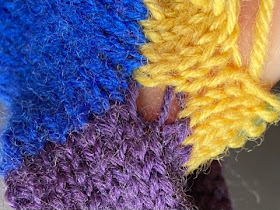
I have been tinkering with provisional sts a lot lately because I've been working on gloves, afterthought heels, and similar forms. I blogged about this topic in 2011, but I do things a little differently now. Below is a photographic guide to my latest methods for picking up provisional sts and working added parts. The main challenges we face with this technique are avoiding holes in the corners where sts are added, and also getting an even stitch count.
My 2011 provisional primer illustrated that the live loops above and below the provisional waste yarn are offset by 1/2 stitch, and there are noticeable gaps on either side of the live sts on the top row. For this reason, I recommended picking up 1 additional stitch on each side of the live loops on top. This means you will have 1 more stitch on the top row than you will on the bottom row.
If you want to have the same number of sts on top & bottom, this is a relatively simple tweak. When working the scrap yarn, simply do a k2tog decrease somewhere on the bottom row. In this example, the last 2 sts worked with the scrap yarn, on the far left, are worked together.
(Alternatively you could work the scrap yarn over all sts and do a k2 on the next round over the scrap yarn, but I find that when done this way it is harder to do the next step.)Later when you pick up sts, be sure to thread your lifeline through both sts that are worked together in the k2tog.
When I unpick my scrap yarn, including the sts picked up in the corners on top, I have 12 top sts and 12 bottom sts.
In my 2011 post, I kinda stopped there. But when I returned to this topic recently, I found that if I simply began working these 24 sts in the round, I'll still have holes in both corners:
1. Pick up 2 extra sts on either end in the bottom row. (This means you now have 2 more sts on the bottom than you do on top, but this is temporary.)
3. To correct the stitch count, I like to work 1 round with the 2 extra sts on the bottom, then on the next round I decrease them with a k2tog and ssk. (Note that in several of my recent glove patterns I have instructed knitters to close holes by picking up gap sts and then immediately working them with the next st, but I now prefer working all picked up sts in the first round, then decreasing on the second round.)
Round 1:
At this point if I continue working my 24 sts in the round, my corners are quite tidy. There is a small amount of extra slack in the corners of the top sts, but this will probably self-resolve after the first washing.


