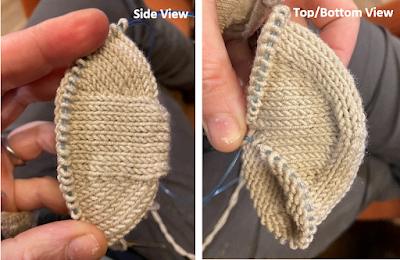
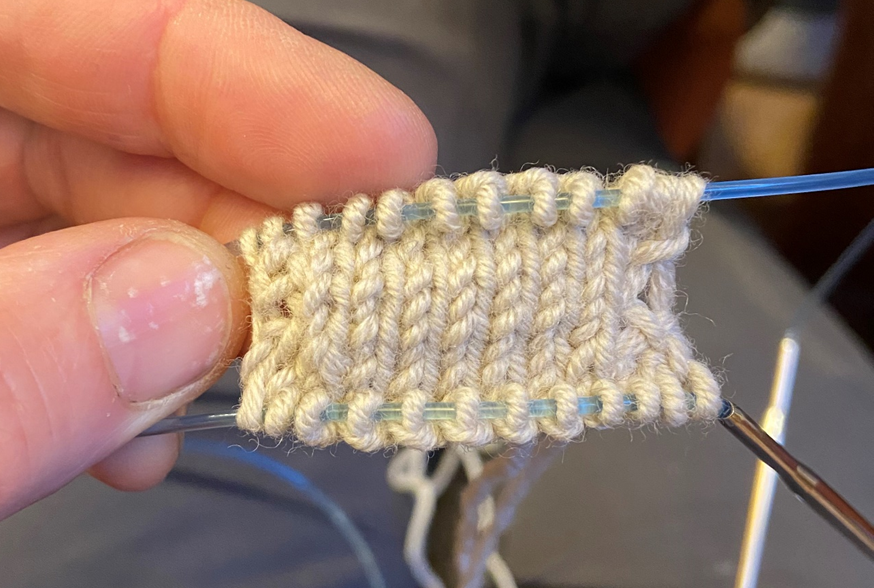
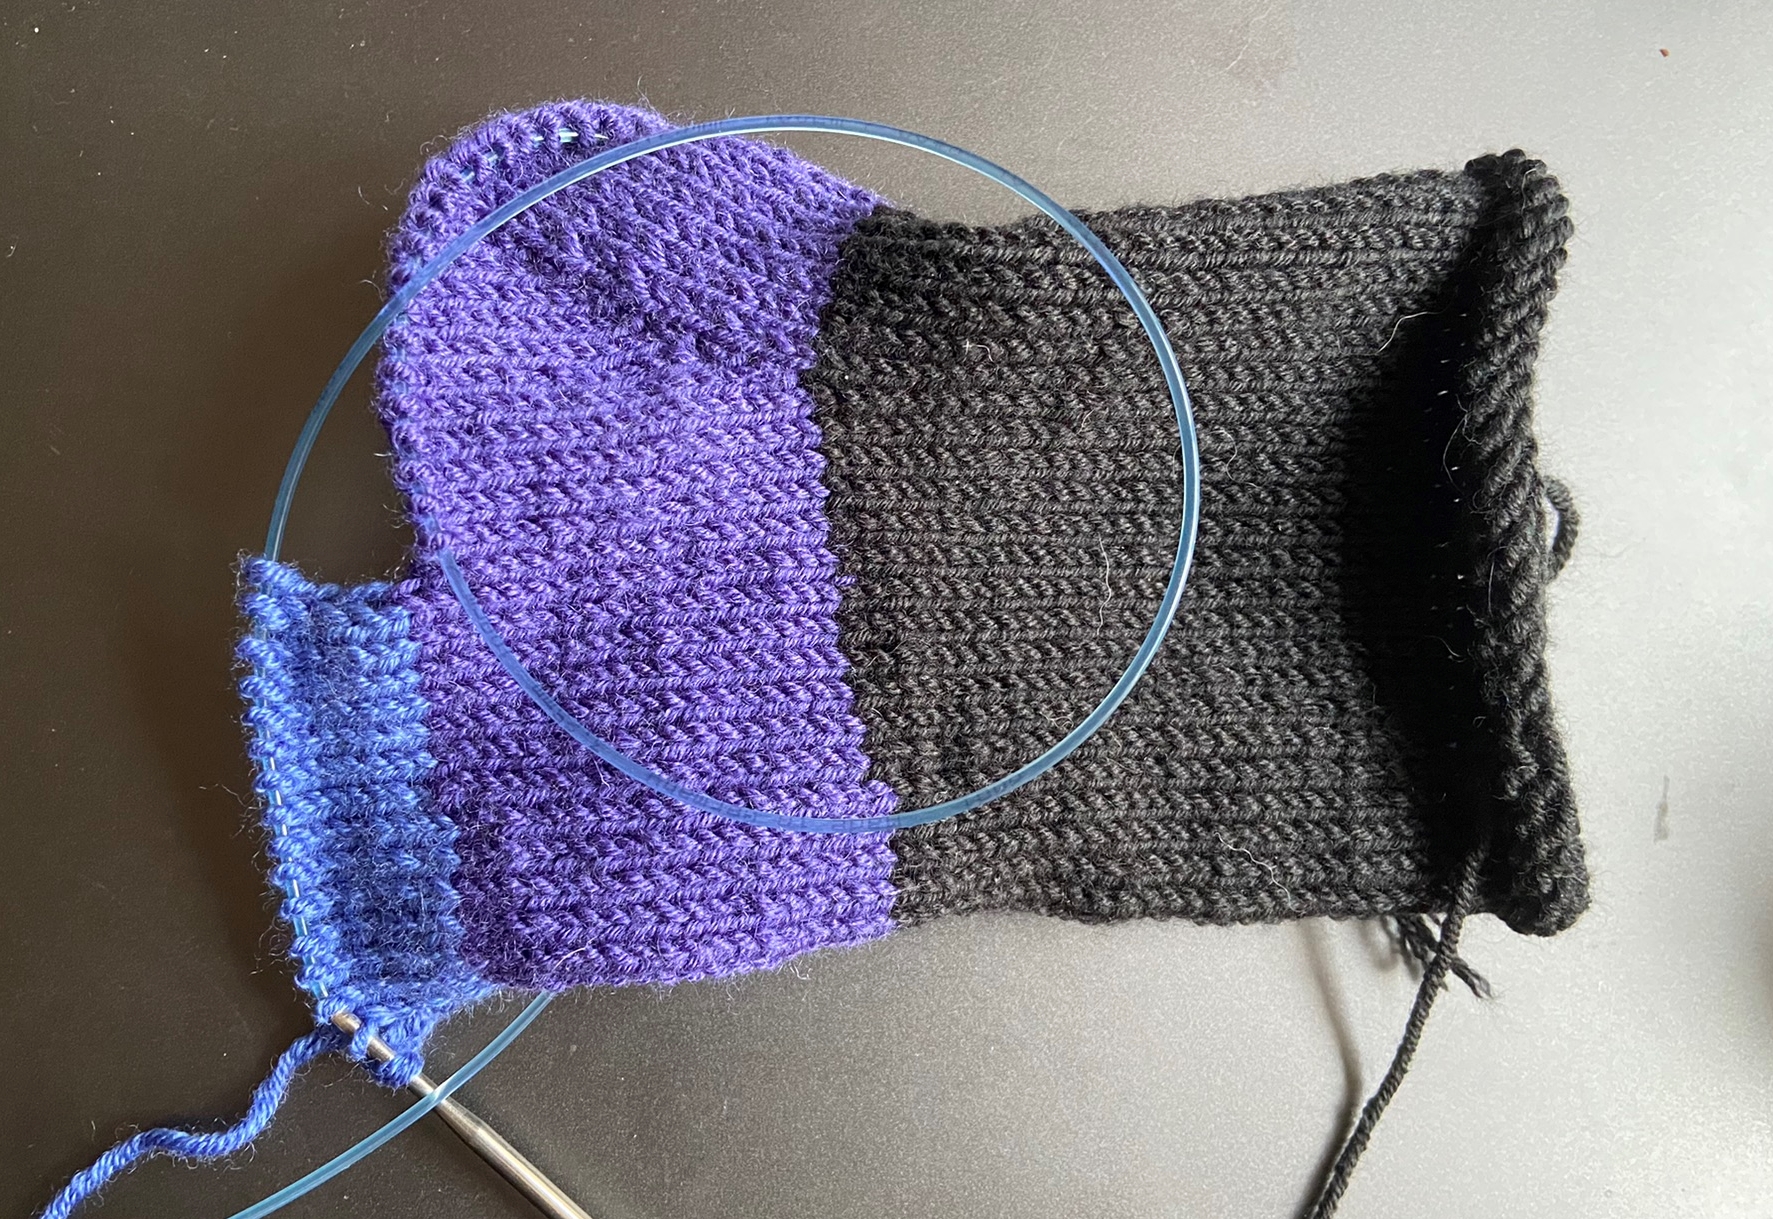
Banditoe is a variation on the classic wedge heel, in which the sides of the wedge go all the way across the foot, in a band.
Yes I realize it has a funny name. It's an ode to the humor of incorrect autocorrects. The story: I came up with this toe configuration with the help of my friend Brenda Dayne. We text each other a lot, and at the time I was calling this the "banded toe." But my phone kept autocorrecting it to "Bandit Toe." So we decided to just go with it, and named it Banditoe!
The method consists of three basic steps. If you're working toe up:
1. Cast on sts provisionally.
2. Work a small tab back and forth.
3. Shift to working in the round; pick up and knit sts along each
side of the tab, then continue working regular increase rounds until you
reach the target stitch count for the foot.
Instructions
Instructions are written for an 8-stitch band in fingering weight
yarn, 8 or 9 st/inch, but Banditoe can be
worked in whatever width band you choose, and worked to any size, any desired final stitch count.
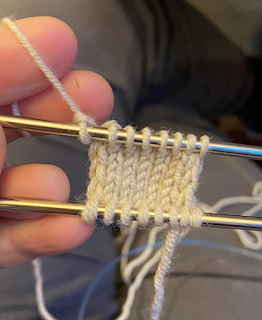
1. Cast on 16 sts using JMCO (8 sts on each needle), rotate 180°.
2. Starting and ending with a knit row, work 7 rows back and forth in
stockinette stitch, slipping the first st pw at the beginning of each. (9 rows total)
3. Shift to working in the round, and continue with toe shaping.
This involves picking up and knitting edge sts using the My Edge
method. Using My Edge is important with Banditoe because the traditional method
leaves a seam on the inside, and especially at the toes I find this is
uncomfortable.
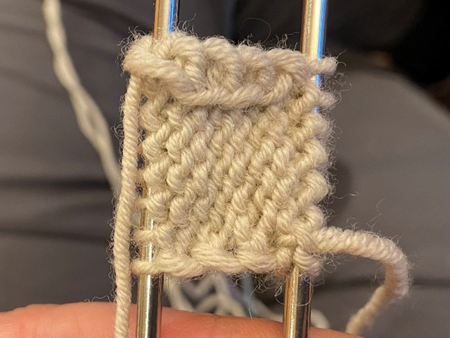
- Pick up and k tbl 4 sts along the edge.
4 edge stitches viewed from the WS.
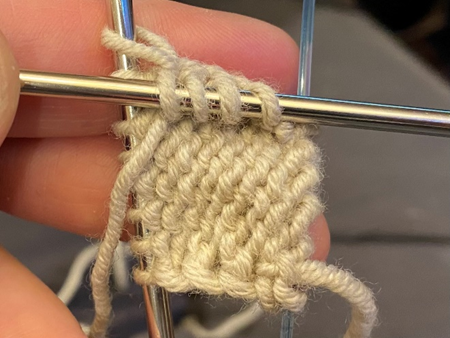
Here the outer legs have been picked up but not
yet worked.
4 edge stitches picked up and each worked tbl.
- Now k8 to the other side of the band, pick up and k tbl 4 sts along other edge in the same way. 24 sts.
- Once you
have picked up sts along both edges, k22, stop; this leaves the last 2 sts in
the round unworked. Group them with the next 10 sts on one side; 12 st remain
on the other side. The band is now in the middle on each side. Image shows the sts ready for being worked on a magic loop.
Now simply follow the chart below. You may choose whatever increase pattern that works for you; I like to work the first 4 increase rounds consecutively, then the next 5 alternating with a non-shaping round.
Banditoe can also be worked top down. I don’t have a tutorial yet
for working in this direction, but conceptually it’s the opposite of the three
steps for working toe up:
1. Work regular shaping (decrease) rounds until you are almost at
the tip of the toe.
2. Work a band back and forth a few times, decreasing on each side
(like turning a heel).
Flap & turn heels don't have to be worked cuff down!
When working a square heel using the traditional cuff down method, first you work a flap, and then you turn it at the base. Hence the name "flap & turn." Then you pick up sts along the sides of the flap and work gusset decreases in the round.
Toe up, you simply work in the opposite order:
1. Increase by the number of desired gusset sts. 2. Work the sole as a flap. 3. Pick up the edge sts around the sole flap, then work back-and-forth across the heel back, working the last stitch on each side with a gusset stitch on each turn.
This is why I want to avoid using the term "heel flap." It's used to describe the flap worked at the back of the heel. However, when you work toe up, the sole is the flap, and the heel back is the turn.
The traditional proportions for the Dutch/square heel are 1/2 of total stitches for the back of the heel, and 1/3 of those stitches for the sole. This creates a small gusset and a narrow band at the sole, like this.
Source: Folk Socks, Nancy Bush (Interweave Press, 1994).
I personally prefer to work my sole over 2/3 of the heel back. This simple change improves the fit greatly IMO; the sole (blue) is now the same width as the weight-bearing part of my heel, and it leaves more room in the gusset.
If you work a flap & turn heel from the toe up, you have to know how many stitches and rows you'll need in the different parts of the heel before you knit it. So I’ve put together a chart with the numbers you'll need. (Note this is not a custom fit worksheet. For custom fit socks, Kate Atherley is your guru.)
Click on the chart to see a larger image.
Detailed instructions
1. Work the gusset increases.
It's up to you to determine where to begin your gusset increases. I start mine at about the middle of my arch.
Starting with 48[56, 64, 72, 80] sts, increase by 2 sts every other round until you have increased by 9[10, 11, 12, 13] sts on each side of the sock.
2. Work the sole as a flap.
Select the desired location for the sole of the foot. From the center of this location, k 8[9, 10, 11, 12] sts, turn. Sl 1 pw, p 15[17, 19, 21, 23] sts, turn.
Black: foot. Purple: Gusset. Blue: sole flap.
Work the sole flap back and forth over a total of8[10, 12, 14, 16] rows. You should be able to count 4[5, 6, 7, 8] sts along each edge of the flap, starting 1 row below the live sts on the needle, up to & including in the last full round below the flap.
For a detailed tutorial on how I pick up and work the edge stitches of a heel flap, please see this companion post on my blog.
Stitches along the RS left edge. The purple stitch is from the last round worked before the flap. This sole flap is 8 rows high.
3. Work the heel back.
Pick up and knit tbl 4[5, 6, 7, 8] sts along the RS left edge of the sole flap, working the last into an ssk with the adjacent gusset stitch to its left, turn. Sl 1 pw, purl back to other edge of the sole flap, pick up and purl 4[5, 6, 7, 8] sts along WS left edge, working the last into a p2tog with the adjacent gusset stitch, turn.
* Pro-tip #1: The ssk and p2tog on this first set of turns will each have a gap if you work them traditionally. See ssk example below. For more details on working these two decreases please visit this post, section 3, "working decreases with picked up sts," which goes into detail on this point.
The image below shows stitches picked up along the R edge of the sole flap (viewed from RS). Note how the sts lean the opposite way from normal. When you purl these sts (from the WS) they will twist in the opposite direction as the sts on the other side of the flap.
Now that you have incorporated the sts along both sides of the sole flap, work back and forth across the heel back, each time ending with an ssk (RS) or p2tog (WS), until you have decreased all the gusset sts you created earlier and you have returned to your original stitch count of 48[56, 64, 72, 80] sts. The heel is now complete and you can resume working in the round.
* Pro-tip #2: To avoid having a gap at the top of the heel back on the right side, after you work the last ssk, continue working around the front of the sock, and work that last decrease as a k2tog from the RS. In the image below, do a k2tog into the first 2 sts on the L needle.
* Pro-tip #3: I always get loose stitches on the left side of my heel back. To help with this, I use the hungry stitch method to tighten up this side. Even after using hungry stitch, I still manually distribute the slack across the rows as needed. In the photo below, the stitches in the lower half of the heel back have been manually adjusted, and those in the upper half have not.
I often come up with my own knitting methods instead of using traditional ones, and picking up & working edge stitches is no exception. The traditional method works well for sweaters, but I don’t think it’s the best method for socks.
In this post I will cover the following:
Brief review & recommended tutorials for traditional method of picking up and knitting edge sts
Tutorial for my method, and why I prefer it to the traditional one
Details specific to working flap & turn heels from the toe up, like JSPH (Jeny's Square Peg Heel)
I will start with a brief word about the last point above, because JSPH has completely transformed the way I think about working edge sts. If you’re working a flap & turn heel from the toe up, picking up and knitting the flap edge stitches is only part of the picture. You also have to pick up and purl on the opposite side of the flap, and also work decreases with picked up sts on the first row. Neither of these is hard to do, just slightly fussy.
If you prefer learning by video rather than still images, I made this video just for you.
0:00 - Pick up and knit 4:23 - Pick up and purl 6:58 - Working decreases with picked up sts
Traditional Method
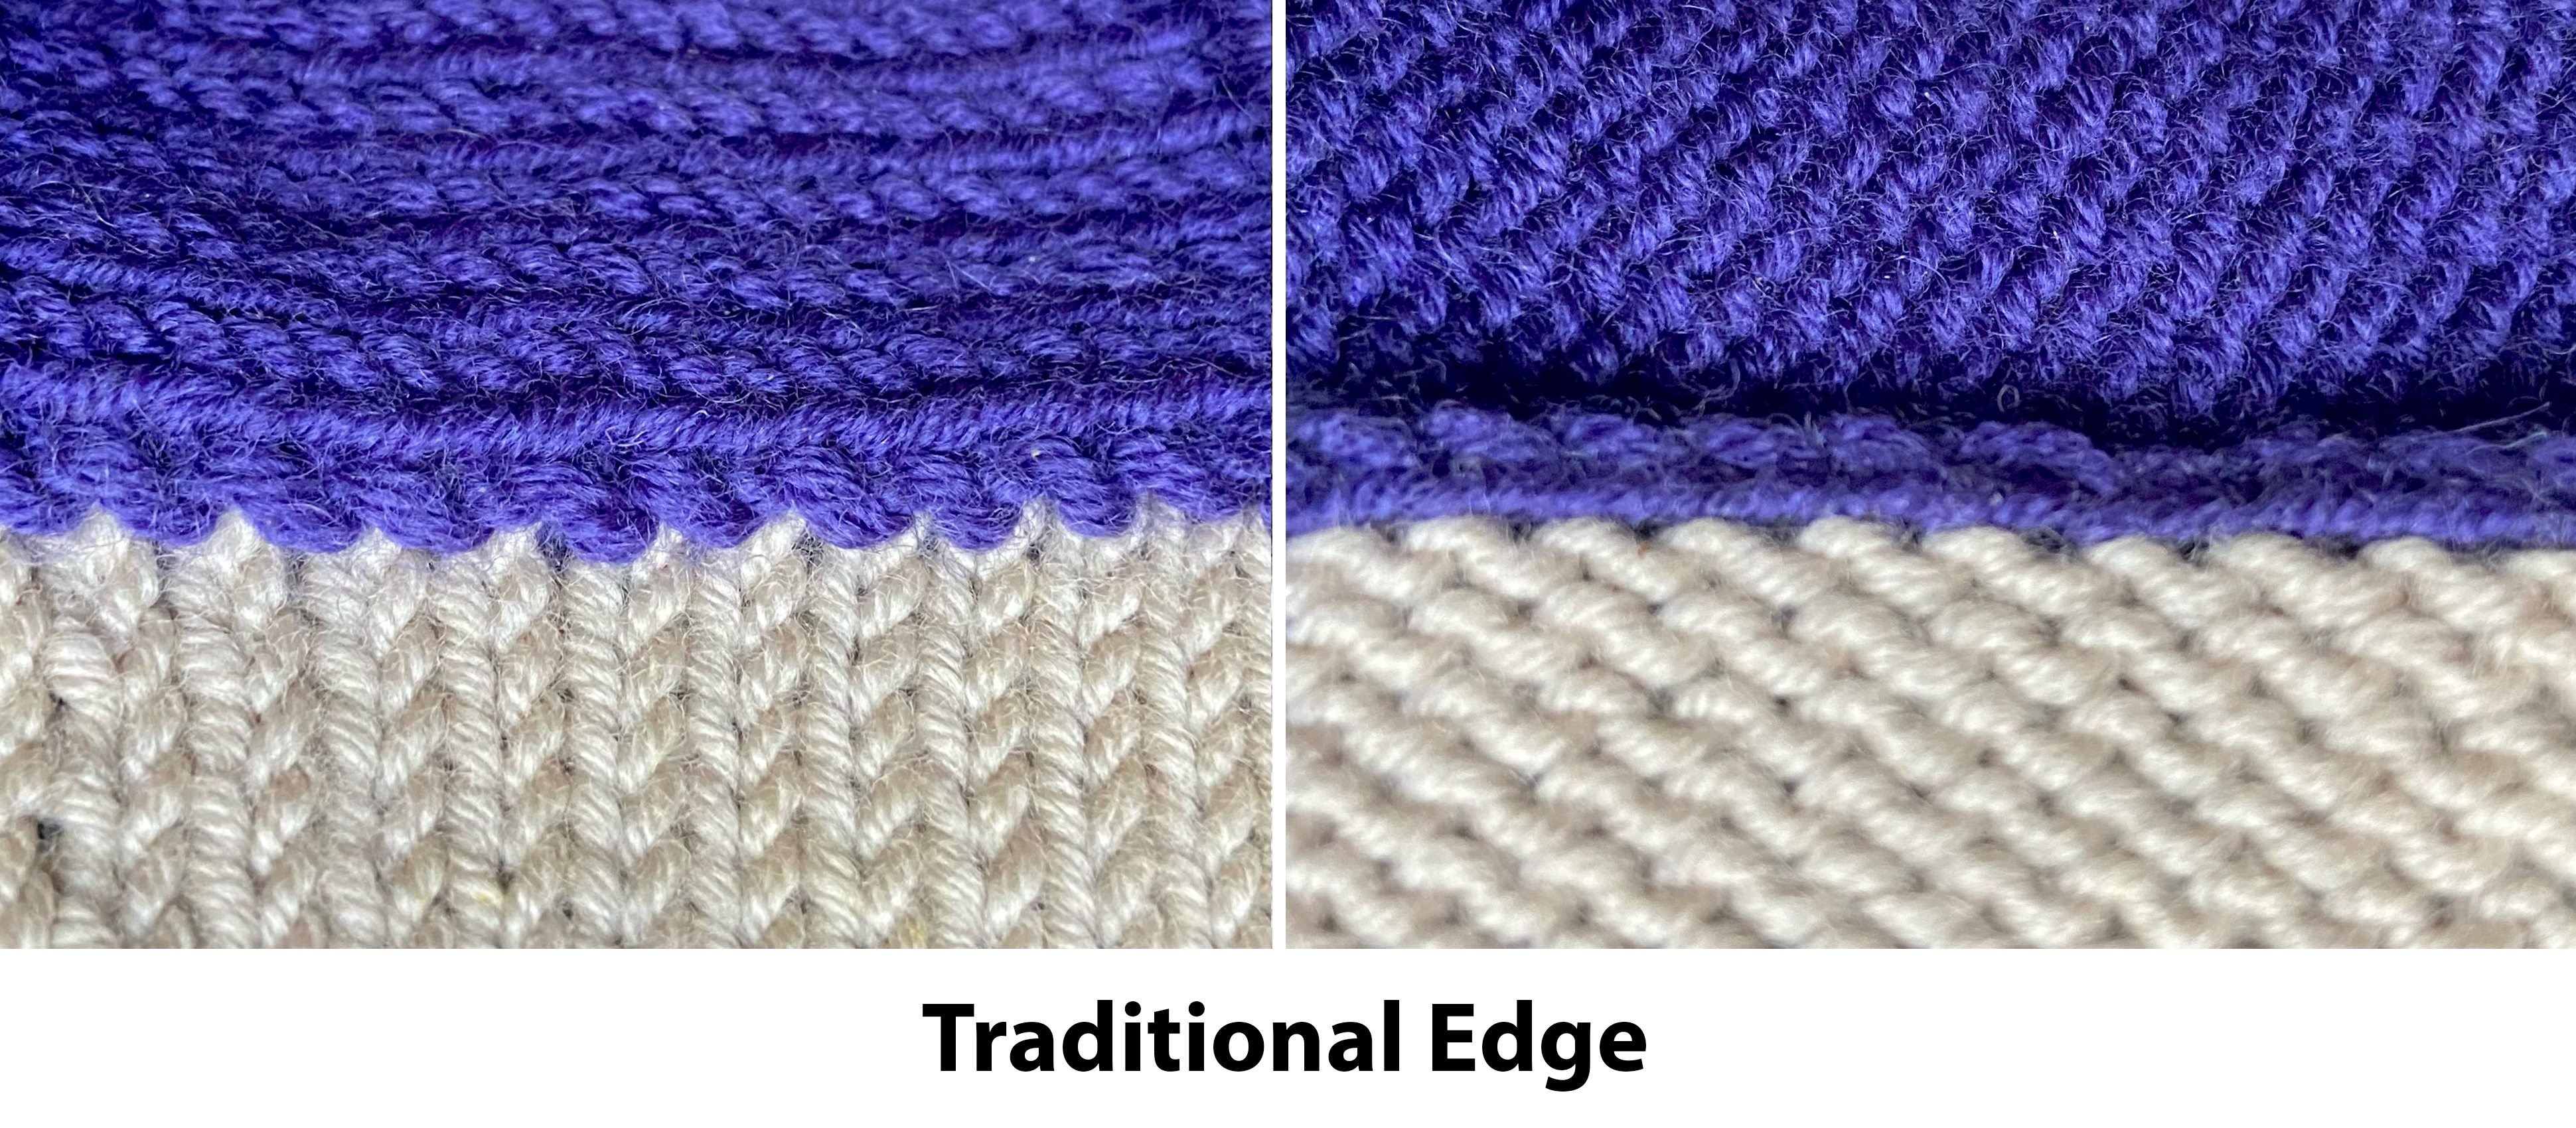
Here is an example photo of what the traditional method of picking up and knitting sts looks like worked in stockinette, RS and WS.
There are lots of tutorials available on the internet on “How to pick up and knit edge stitches.” These generally all demonstrate the same method. I personally recommend this photo tutorial on Modern Daily Knitting written by Kate Atherley, and this illustrated tutorial by TECHknitter (“Added Yarn Method” section). Bear in mind that with socks, it’s not necessary to skip every 2nd or 3rd stitch as you would need to do if you were making a sweater or large garment.
My Method
Let me explain why I don’t use the traditional method when I’m making socks. Look closely at the photos above. The RS looks ok, but on the WS you can see there is a prominent seam. This is fine for sweaters, but for socks it is potentially uncomfortable.
Whereas, this is what I get when I do it my way:
Viewed from the RS, the two methods just look a little different.
But, viewed from the WS, you can see that my method eliminates the bulk of the seam.
I do think the traditional method looks nicer on the inside than mine does. But if it's on the inside, I'm much more concerned about comfort than I am about appearance.
There are two key structural differences between my method and the traditional one: 1) I pick up and work through only the outside leg of the edge stitch, rather than both legs; 2) I twist the leg in a particular way as I work it.
Tutorials on the traditional method often state that working edge stitches through both legs makes the joint more secure, but that's not necessarily the case. The real game changer is to twist the picked up leg as you work it.
Let’s zoom out for a minute...
See how the traditional method is taller at the joint? And the gauge of the new sts (off-white) is slightly expanded right there? And the edge sts (purple) pooch out a little bit? These are all subtle indicators that the traditional method is looser and therefore less secure than mine. Again I’m sure it works well for sweaters, but for socks I think my method works better.
Tutorial - My method
Here is what the flap looks like just before I start working edge stitches. The example shows a sock heel sample. The colors indicate different parts: the purple section represents the foot, the blue section is the flap, and the magenta working yarn represents the first row of edge stitches. Rows begin and end in the middle of the flap.
It's easier to see the stitches on the WS. There are exactly 12 edge stitches that I'm going to pick up, numbered 1-12 below. Stitch #1 is immediately below the last stitch worked, and stitch #12 is actually below the first turn of the flap; the color change indicates that this stitch was worked in the round.
The stitches can each be picked up and immediately worked, or you can pick them all up first and then work them. I personally prefer to pick them all up before working any of them. I start at #12 and work my way up to #1, but the direction of pickup doesn't matter.
To pick up: I insert the R needle into the middle of the edge stitch, then continue to the next. I typically use a needle 1-2 sizes smaller, because these can be tight.
The resulting row of sts will sit on the R needle just like normal stitches, leading with right leg in front.
Once the stitches are all picked up, knit each one through the back leg. (Note that stitch #1 has been worked once already.) This will twist each stitch and tighten up the joint.
*Note that if you are working a toe-up flap & turn heel, there will be an ssk at the end of the row. This decrease and the p2tog on the other side are worked a little differently from normal. This is discussed in more detail in the last section.
The picked up stitches can be twisted either way, but I prefer the look of them when they are twisted as described above. Below is a comparison example - the stitches on the right half were twisted in the other direction. These are slightly looser and more prominent.
Toe up flap & turn heels
So far I’ve given you everything you need to know for using my edge stitch method with a standard cuff down flap & turn heel. For working toe up, there are some remaining details to cover.
Picking up and purling is slightly trickier than picking up and knitting, but it is not difficult. I find it easiest to hold the flap WS facing me with the edge at the bottom, then rotate it in order to work the purls. Note that even though you have worked down and back from the other side, there are the same number of rows on this side from which you will pick up stitches. Once again, stitch #1 is immediately below the one just worked, and stitch #12 was worked in the round just below the flap.
To pick up: I insert the R needle into each edge stitch, then continue to the next.
This time, the stitches sit on the needle in the opposite direction, leading with the right leg in back.
Now purl each stitch through its front (left) loop. When you turn it to the RS, you will see that the picked up stitches twist in the opposite direction as those on the other side of the flap.
If you are working a toe up flap & turn heel, your first RS and WS row of the heel back are worked as you are simultaneously picking up and working sts. This calls for a bit of jiggery-pokery.
In both cases, if you work the decrease normally you will get a hole. This is what the ssk would look like if worked normally:
So in order to hide this hole, you will twist only the front stitch. When working the ssk, slip the first st purlwise so that it still sits on the needle leading with right leg in front. Slip the next st knitwise. Now both sts lean towards each other on the back side of the needle.
Slip both sts back to the L needle purlwise, then k2 tbl. The resulting decrease twists to the left, just like all the other edge sts that were picked up and knitted (tbl).
To work the adjusted decrease on the purl side, you do something very similar. Both sts are already in the position you need -- they lean towards each other on the front side of the needle.
With the sts in this position, work a p2tog. When you turn back to the RS, you will see that this decrease now twists to the right, matching the other edge sts.
I work these adjusted decreases on the first rows only; for subsequent rows I work regular ssk's and p2tog's.