Saturday, April 2, 2022

Jeny's Square Peg Heel

Meet Jeny's Square Peg Heel, or JSPH. Because I am nothing if not a square peg!

JSPH is an original variation on a traditional square heel. But before I dive into the details of JSPH and why I think it's so cool, I need to start with this... 

There is no such thing as a cuff down heel. Just about every book, video tutorial or blog post about sock knitting classifies standard heels into cuff down or toe up. But any heel that can be worked from one direction can also be worked from the other, it just takes a little reverse engineering. I enjoy knitting socks all kinds of ways, and I won’t let any part of the sock constrain me on how I work. Because I am the boss of my knitting.

Terminology 

Flap & turn heels in particular are thought to be cuff down only. When you work a flap & turn heel traditionally, a "heel flap" is worked in the back, then turned at the bottom. But if you work from the toe up, the term "heel flap" becomes imprecise. So for this post, I am using the following terminology for flap & turn heel anatomy: 

  • Gusset (purple) - Where more stitches accommodate the widest part of the foot/ankle.
  • Heel Back (red) - Goes around the back of the heel.
  • Sole (blue) - Goes under the weight bearing area of the heel.

When working a square heel using the traditional cuff down method, first you work a flap, and then you turn it at the base. Hence the name "flap & turn." Then you pick up sts along the sides of the flap and work gusset decreases in the round. 

Toe up, you simply work in the opposite order:

1. Increase by the number of desired gusset sts.
2. Work the sole as a flap.
3. Pick up the edge sts around the sole flap, then work back-and-forth across the heel back, working the last stitch on each side with a gusset stitch on each turn. 


Hopefully you can see now why I want to avoid using the term "heel flap." It's used to describe the flap worked at the back of the heel. However, when you work toe up, the sole is the flap, and the heel back is the turn. 


The remainder of this post will demonstrate two different ways to knit JSPH: toe up, and cuff down. See this companion post for a tutorial on how I do a standard square heel from the toe up.

Gauge & Sizing

All instructions below are based on standard sock gauge of 32 sts x 44 rows = 4" in stockinette using fingering weight yarn on US size 1 needles. Stitch counts conform to standard sizes XS[S, M, L, XL] in which unstretched sock circumference is 6[7, 8, 9, 10] inches.


Jeny’s Square Peg Heel (JSPH)

JSPH morphs and moves around the parts of the square heel and yet somehow ends up with a fit that is identical to a standard square heel of the same sole width. I really enjoy coming up with designs and techniques that seem like they can't possibly work, but then they do! JSPH is like that. 

If you look at the JSPH sample next to my square heel, you can see that the sections of the heel have different shapes and positions, but still have the same fit.


Left: My square heel. Right: JSPH.

With JSPH, the gusset is worked above the heel, rather than as part of the foot. Because of this structure, JSPH gives you design opportunities you wouldn't have with a standard flap & turn heel. Brenda Dayne's Funky Grandpa socks below demonstrate this nicely. Because the gusset is worked above the heel turn, the stripes worked in the round can extend an additional 2" further down compared with a traditional square heel.  

(c) Brenda Dayne, 2022.


JSPH can be worked either toe up or cuff down. Let’s continue with the toe up direction for now, because the method is similar to that of my basic toe up square heel.  Below is the chart you can use for finding your JSPH size and numbers. This chart applies to working either cuff down or toe up. 

Click on the chart to see a larger image.


JSPH Toe up

The basic method for working JSPH toe up is the same as the basic square heel, except that working the gusset now happens last, and is worked in decreases rather than increases. And of course the shapes of the heel back and sole are quite different. 

1. Work the sole turn as a flap.

Work the foot over 48[56, 64, 72, 80] sts until you would normally begin working gusset increases (for me, this is about the middle of the arch). Select the desired location for the sole. From the center of this location, k 8[9, 10, 11, 12] sts, turn. Sl 1 pw, p 15[17, 19, 21, 23] sts, turn.


Work the sole flap back and forth until you can count 13[15, 17, 19, 21] sts along the RS left edge of the flap, starting 1 row below the live sts on the needle, up to & including in the last full round below the flap. 

2. Work the heel back


Pick up and knit tbl 13[15, 17, 19, 21] sts along the RS left edge of the sole flap, working the last into an ssk with the adjacent gusset stitch to its left, turn. Sl 1 pw, purl back to other edge of the sole flap, pick up and purl 13[15, 17, 19, 21] sts along WS left edge, working the last into a p2tog with the adjacent gusset stitch, turn.

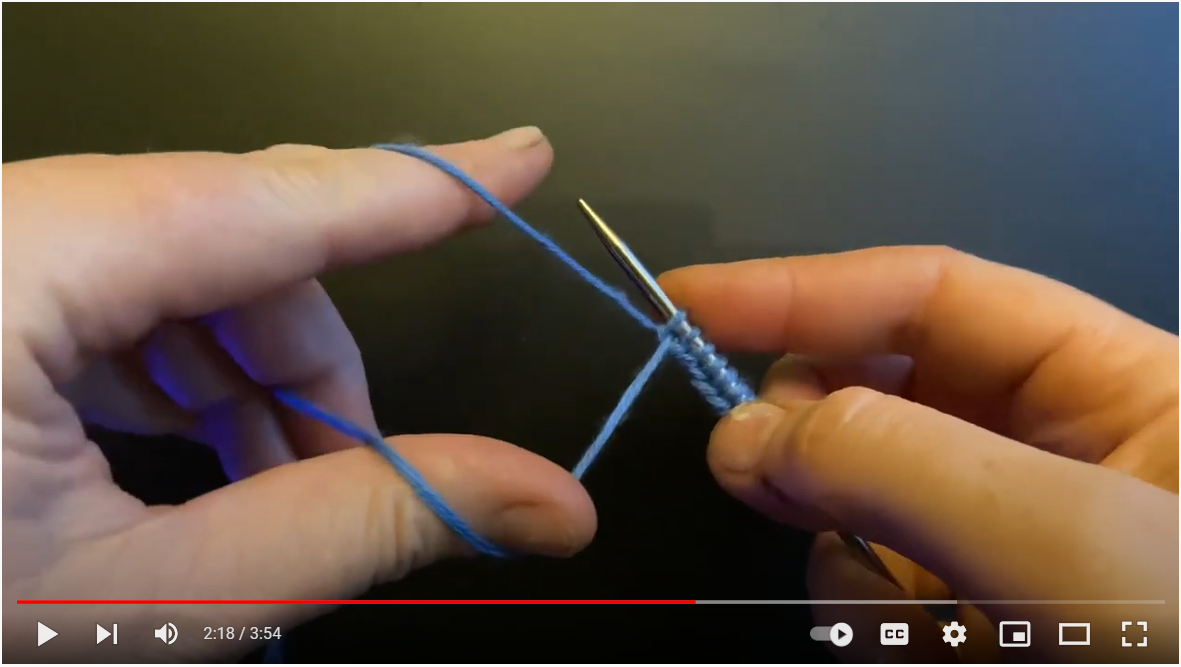
For a video tutorial on picking up and working the edge sts and in particular the first decrease of each row, visit this video on the My Edge technique for picking up sts.  The images below give a preview of the demo for this technique.
Video sections:  
0:00 - Pick up and knit
4:23 - Pick up and purl
6:58 - Working decreases with picked up sts 

* Pro-tip #1: The ssk and p2tog on this first set of turns will each have a gap if you work them traditionally. See ssk example below. 


If you work the ssk traditionally, there will be a hole in your work.


The 2 sts to be worked together should be oriented so that they are leaning in 
opposite directions. For the ssk, the first st is R leg forward, the next st is R leg back. 
(For the p2tog, it's the opposite.)


Slip both sts back to L needle and k tbl. The front stitch of your ssk 
twists to the left, just like all the rest of the sts on this row.

Work back and forth from edge to edge, each time ending with an ssk (RS) or p2tog (WS), until you have decreased by 4[5, 6, 7, 8] sts on each side. Your heel back will be a total of 8[10, 12, 14, 16] rows high. 

* Pro-tip #2: To avoid having a gap at the top of the heel back on the right side, after you work the last ssk, continue working around the front of the sock, and work that last decrease as a k2tog from the RS. In the image below, do a k2tog into the first 2 sts on the L needle.


* Pro-tip #3: I always get loose stitches on the left side of my heel back. To help with this, I use the hungry stitch method to tighten up this side. Even after using hungry stitch, I still manually distribute the slack across the rows as needed. In the photo below, the stitches in the lower half of the heel back have been manually adjusted, and those in the upper half have not. 


3. Work the gusset decreases


Working in the round, decrease by 2 sts every other round until you have returned to your starting stitch count of 48[56, 64, 72, 80] sts. 


JSPH Cuff down

This method is essentially the same as working a standard flap and turn heel except 1) you work the gusset first, as part of the leg, and 2) the shapes of the heel back and sole are very different!  

1. Work the gusset increases


Starting with 48[56, 64, 72, 80] sts, work the leg to the point where you would normally start working the flap for the heel back. Instead, work the gusset. Increase by 2 sts every other round until you have increased by 9[10, 11, 12, 13] sts on each side. 

The gusset needs to be shaped in a particular way to fit together with the heel flap. Divide your stitches into those in front and those in back, with an equal number in each group. Then:
- Work across the front stitches.
- Work 1 left leaning increase, work across all the back stitches, work 1 right leaning increase. 2 stitches increased on the back side; front side is still 1/2 of original stitch count.
- Work 1 full non-shaping round.  
- Repeat the last shaping round, placing the new increases on the outside of the back sts. 
- Alternate shaping and non-shaping rounds until you have increased by the target number of gusset stitches, all on the back side.

2. Work the heel back (flap)

From the center of the heel back, k [24, 27, 30, 33]  sts, turn. Sl 1 pw, p 41[47, 53, 59, 65], turn. Continue working the flap from edge to edge until you have worked a total of  8[10, 12, 14, 16] rows. You should be able to count 4[5, 6, 7, 8] sts along the RS left edge of the flap, starting 1 row below the live sts on the needle, up to & including in the last full round below the flap.

3. Work the sole

Work to the halfway point of the flap, then k 7[8, 9, 10, 11], ssk, turn. Sl 1 pw, p 14[16, 18, 20, 22], p2tog. Work back and forth, each time decreasing the last sole st into the flap, until you have integrated all the flap sts into the sole.

* Pro-tip #3: See above.

From the present location of the working yarn, pick up and knit 4[5, 6, 7, 8] edge sts along the heel back flap, k across the front of the foot to the other flap edge, then pick up and knit another 4[5, 6, 7, 8] sts. Your present stitch count should now be your original 48[56, 64, 72, 80], and you can continue working the foot in the round.


You made it to the end! 

Congratulations! Now, would you like to hear something else fun?

Epilogue. If you take any heel + gusset assembly and work it upside down in your sock pattern (i.e., work a supposedly "cuff down" heel and gusset from the toe up), it's likely it will fit you just as well as if worked as instructed. You may have already noticed that JSPH visually resembles a square heel flipped upside down. The pictures below show that both of these heel structures fit me equally well worn upside-down or upside-up.

Left: My square heel.   Right: JSPH.
Worn upside-down:

Worn upside-up:


I dare you to play with this. Welcome to my sandbox! 

Please stay tuned for upcoming designs featuring this heel structure, there are several in the works.  

Thursday, March 31, 2022

Stretchy Cast Ons!


Do you have a knitting BFF? I do, and her name is Brenda Dayne. 💕 Despite being separated by 8 time zones and almost 5,000 miles, Brenda and I often find time to text and videochat about knitting. She has been podcasting about knitting for many years, long before we met in person. This week she and I get into the nitty gritty of stretchy cast ons. We discussed the three methods below in particular. For details on each, listen to our conversation on the latest episode of her podcast, Cast On.  All of her episodes are available at https://www.brendadayne.co.uk/.

There are many videos online about these techniques. Note that the way I do #2 and #3 is a little different from the standard method.

  1. Slip Knot Cast On (known by many names, but still just a series of slip knots.)
    My video from 2009 is here.
    Hand's Occupied's take on my method is here. A great interpretation of what I originally did.
    Janel Laidman Vaisbort's video is here - structure is slightly different than mine, and a little easier to tighten.
  2. Long Tail Cast On my way is here
  3. German Twisted Cast On my way is here

Soon I will be sharing with you a new heel design I have come up with recently, affectionately named "Jeny's Square Peg Heel" or JSPH for short. Stay tuned!

Thursday, February 17, 2022

My Pie.


Everyone has their own favorite way of making pie, especially the crust. I believe that a pie maker should follow whatever method they most enjoy. The most important thing is to have fun! The method documented below is what is most fun for me. It just happens to also look and taste awesome.

In brief, this is what I do. Note that some parts of my process defy traditional methods.
  • I make an all butter crust; butter is integrated in two separate steps using different mixing methods.
  • When cutting in the butter, I leave the chunks large (marble-sized). 
  • Ice water is mixed in by hand, not in the food processor.
  • Crust can be rested and then rolled, or rolled and then rested; order doesn’t matter. (Some bakers think this is heresy, but it works for me.)
  • Crust is rolled out between sheets of plastic wrap, not on a floured surface.

And now in not-brief, here is my definitive process of making pie.

What makes a flaky crust:
The primary thing to many pie bakers and eaters, and possibly the most contentious, is how one achieves the perfect balance of tenderness, flakiness, and taste. Many people swear by a combination of fats — part butter and part Crisco or lard. Here I can offer a food-science explanation for why a combination of fats typically results in a flaky crust, and some different ways to achieve that.

One of the keys to making a pie crust that is crispy and flaky is not what specific combination of fats you use, but rather the result of how those different fats disperse when you cut them into the flour. Cold butter stays in firm chunks, whereas Crisco/lard will quickly disperse and coat the individual flour grains. The combination of fat-coated flour grains and firm chunks of fat is the goal. But it’s not necessary to use multiple different fats to get this effect. I've identified three different ways of getting this effect using all butter. 
  • Divide the butter ahead of time, keep most of it cold and let a portion come to room temperature; cut into the flour in one step just as you would butter + Crisco/lard. OR,
  • Keep all the butter cold and add in two separate steps: first blend in a portion completely until the flour grains are coated, then cut in the rest, leaving large chunks. (This is how I do it.) OR,
  • Keep all the butter cold and cut into the flour, leaving large chunks, then rub the mix with your hands until the flour starts to get slightly sticky. 

Pro-tip: cutting in butter using any of these methods also applies to making excellent biscuits and scones.

Note that you’re not limited to Crisco and lard as alternative fats. Duck, beef and lamb fat, to name a few, are also great choices especially for savory pies. Coconut oil would probably be great also, but I haven't tried that.

Here is how I make my crust.

Ingredients:
  • 320 g flour (same weight gluten-free or wheat) This is about 2-2 1/2 cups.
  • 1 c unsalted butter (divided into 3/4 c and 1/4 c, cubed & cold)
  • 1 tsp salt
  • 8-12 Tb ice water
  • (GF only — 1 tsp vinegar. This is recommended by America's Test Kitchen to help with flakiness. I often forget to add it though, and my GF crust still turns out great.)

Instructions:

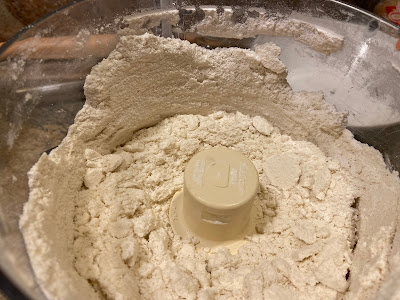
1. Put the flour, salt, and 1/4 cup of butter into a food processor. Process on high until the flour begins to stick together very slightly as it spins around the bowl. There should be no visual trace of the butter; it should be completely integrated.


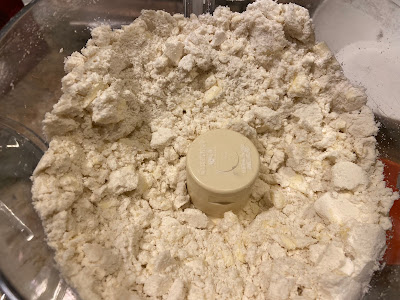
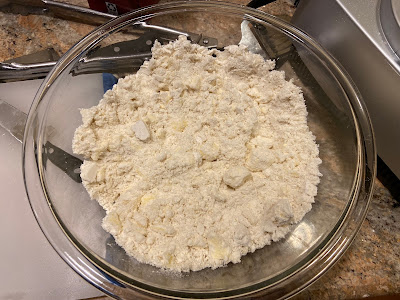
2. Sprinkle the remaining 3/4 c cold cubed butter into the flour mix. Pulse a few times until you have marble-size chunks. This is larger than what most cooks recommend, but this is what works for me. I prefer to be conservative, and to cut up any too-big pieces later if I deem necessary.


Pro-tip: consider making an extra bag of this flour mix and storing it in the fridge, in the event that you accidentally add too much ice water in the next step. If that happens and you add more plain flour to compensate, your result will not be as good.


3. Pour the flour mix from the food processor into a bowl so that you can mix in the ice water by hand. Mixing by hand gives you much more control over working the dough as little as possible and also maintaining the desired size of the butter chunks. Picture below shows the mix before any water is added.


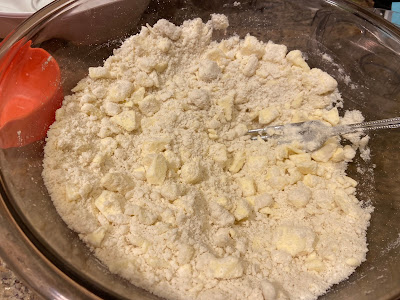
4. Start with 8 tablespoons of ice water. (If you are making a GF crust, first add the teaspoon of vinegar to this water.) Stir briskly around the periphery of the bowl with a fork, occasionally cutting through the middle of the bowl. This movement should moisten everything evenly with as little working of the mix as possible. Picture below shows the mix with 8 Tb ice water incorporated. Sometimes this is enough for the dough to stick together, but not this time. It looks a little different from the photo just above, but there is not yet enough water in this dough.


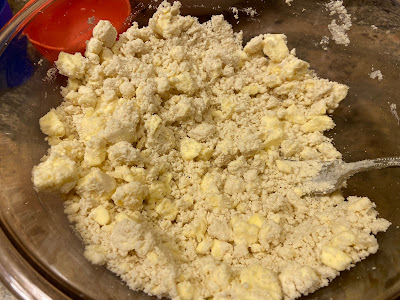
5. If after adding 8 Tb of ice water your mix is still a little dry, add another 2-3 Tb. The dough pictured below has the right amount of water for it to stick together when pressed. (For reference, I find that 10 Tb is usually perfect. I never need more than 12 Tb.)


Note that the mix is still “shaggy” — you don’t keep adding water until the dough sticks together, just until it is barely and evenly moistened. (As per pro-tip, if your result is too wet, compensate by adding flour mix from your reserve bag held just for this purpose.)


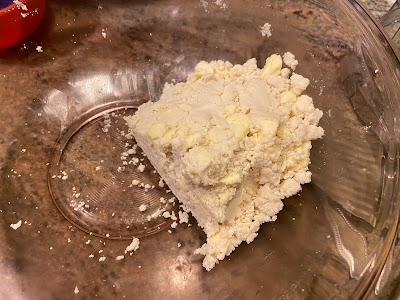
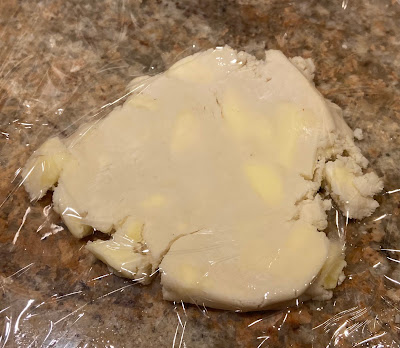
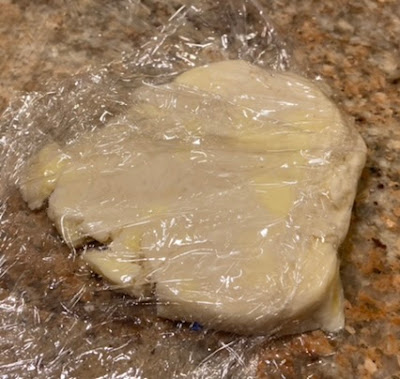
6. Press the shaggy dough together gently; do not knead or compress into a firm ball. Cut into 2 roughly equally sized pieces. (If you are making hand pies, one batch of dough makes eight equally sized pieces, probably about 85 g apiece.)  Picture below shows 1/2 of the dough, after it is cut into 2 pieces.


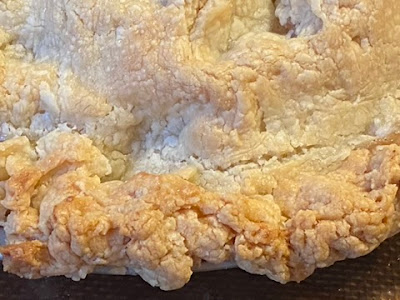
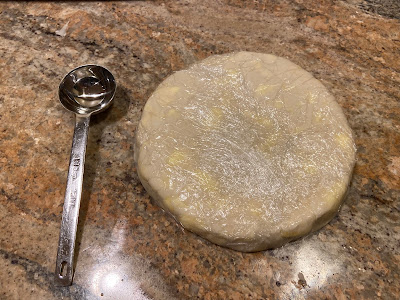
7. Press each of these into a round flat disc about 1/2 inch thick on a piece of plastic wrap, seal and rest in the fridge for an hour or so. Picture shows a tablespoon for scale. Note the spotty surface -- these are the chunks of butter that will melt and leave thin layers of dough, thus creating the sought-after flakiness.


If you choose, you can alternatively roll out right now into the final size and shape, so long as the butter is still cold and firm. If you roll first, you will need to rest in the fridge afterwards. 

Resting the dough: This is an important step. The dough needs at least an hour of rest in the refrigerator, either before or after rolling. If it’s a wheat crust, the resting time helps the gluten to relax after mixing/rolling, which yields a more tender result. If it’s a GF crust, it needs time to absorb the moisture in the dough because the grains in GF flour are less permeable than wheat. In both cases, keeping the dough cold is important because that keeps the butter firm, which is key to a flaky crust. 

Rolling the dough: Make sure you lay out enough plastic wrap to accommodate the final size and shape you want (it may be multiple sheets wide for a full size pie). As cracks form along the edge, compress them together using the plastic wrap to apply pressure. The plastic wrap may tear as you roll it; peel and replace as necessary. 

Pictures below show a small piece of dough for a 2-crust mini tart. As you begin to roll, cracks will inevitably form along the edge. 


Below: Fold the plastic wrap over the cracked area and compress; then unfold and continue rolling. Repeat folding, compressing, and unfolding as necessary.


Below: The crust rolled out, cracked edges smoothed and compressed. Those large spots of butter are exactly what will give you a nice flaky crust!


Once rolled and rested, place into the pie plate as follows:

1. Remove one side of plastic wrap and set gently back on top.

2. Flip over, remove the other side of the plastic wrap.

3. Plastic side up, position the crust centered over your pie plate and press into the sides. Do this gently; the more pressure you apply when pressing into the plate, the tighter the plastic will adhere to the surface, the softer your dough will get, and the trickier it will be to remove the plastic without tearing the dough.

4. Carefully remove remaining plastic wrap.

Then, fill as desired. If you’re making a double crust pie, repeat the above steps with the top crust. Crimp sides as you wish. Make sure to cut vents in the top so the sides don’t blow apart.

Here is what I do for my apple pie filling.

Apple filling ingredients:
  • 5 medium sized apples, a combination of Granny Smith and some other firm high acid variety like Honeycrisp
  • 1/2 c white or brown sugar
  • 32 g flour (about 1/3 to 1/2 the volume of sugar)
  • 1/2 tsp cinnamon
  • Juice of one lemon
  • 1 Tb melted butter

Optional add-ins: 1/2 tsp salt, other spices like ground cardamom, coriander, or cloves, or even savory spices like red pepper or paprika. You can also add sharp cheese, or a custard or frangipani filling. Fresh halved cranberries is one of my favorite add-ins.

Instructions:

1. Apple pieces should be medium-thin; first peel and quarter the apples, then cut each quarter into 4-5 slices.

2. In a separate bowl, mix together the sugar, flour, and cinnamon. It’s important to do this before you add to the apples, otherwise you might get clumps of flour.

3. Add the sugar mix to the apples and stir. Add the lemon juice, then the melted butter. Arrange the apples inside the bottom crust as desired.

4. Top with the second crust, crimp sides, cut vents, finish surface as desired. I like to dust with granulated sugar, and I don’t bother with egg wash.

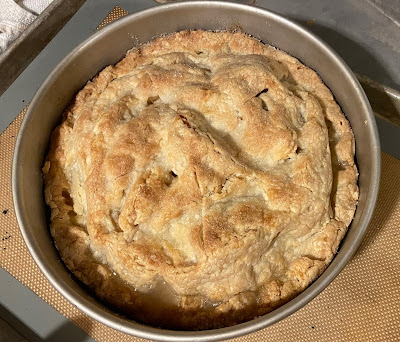
5. Place in the lower third of the oven, bake at 375° with convection on for a total of 50 to 60 minutes, rotating halfway through the baking process. The pie is done when you start to see syrupy bubbles coming through the top vents and/or the crust edge. Do not judge by the appearance of the crust. If it’s getting brown but not yet bubbling, try moving it to a lower rack of the oven and/or placing a sheet of foil on top of it.


Note that if you are making a GF crust, I recommend you have some support around the side of the pie plate, because GF pie crust tends to spread over the edge and break off. If your pie plate can slip snugly into a springform pan, that’s perfect. 


Another way to provide support for GF pies is to construct a foil collar and staple it together around the periphery. The picture below shows 4" mini GF tarts in and out of their little makeshift foil pans.


I hope you find this photo-documentation useful in your pie making. I believe we each have our own ways of doing things, and I encourage you to make your pie process your very own. Trust your instincts and have fun!