
Flap & turn heels don't have to be worked cuff down!
When working a square heel using the traditional cuff down method, first you work a flap, and then you turn it at the base. Hence the name "flap & turn." Then you pick up sts along the sides of the flap and work gusset decreases in the round.
Toe up, you simply work in the opposite order:
1. Increase by the number of desired gusset sts.
2. Work the sole as a flap.
3. Pick up the edge sts around the sole flap, then work back-and-forth across the heel back, working the last stitch on each side with a gusset stitch on each turn.


Detailed instructions
1. Work the gusset increases.

It's up to you to determine where to begin your gusset increases. I start mine at about the middle of my arch.
Starting with 48[56, 64, 72, 80] sts, increase by 2 sts every other round until you have increased by 9[10, 11, 12, 13] sts on each side of the sock.
2. Work the sole as a flap.

Select the desired location for the sole of the foot. From the center of this location, k 8[9, 10, 11, 12] sts, turn. Sl 1 pw, p 15[17, 19, 21, 23] sts, turn.
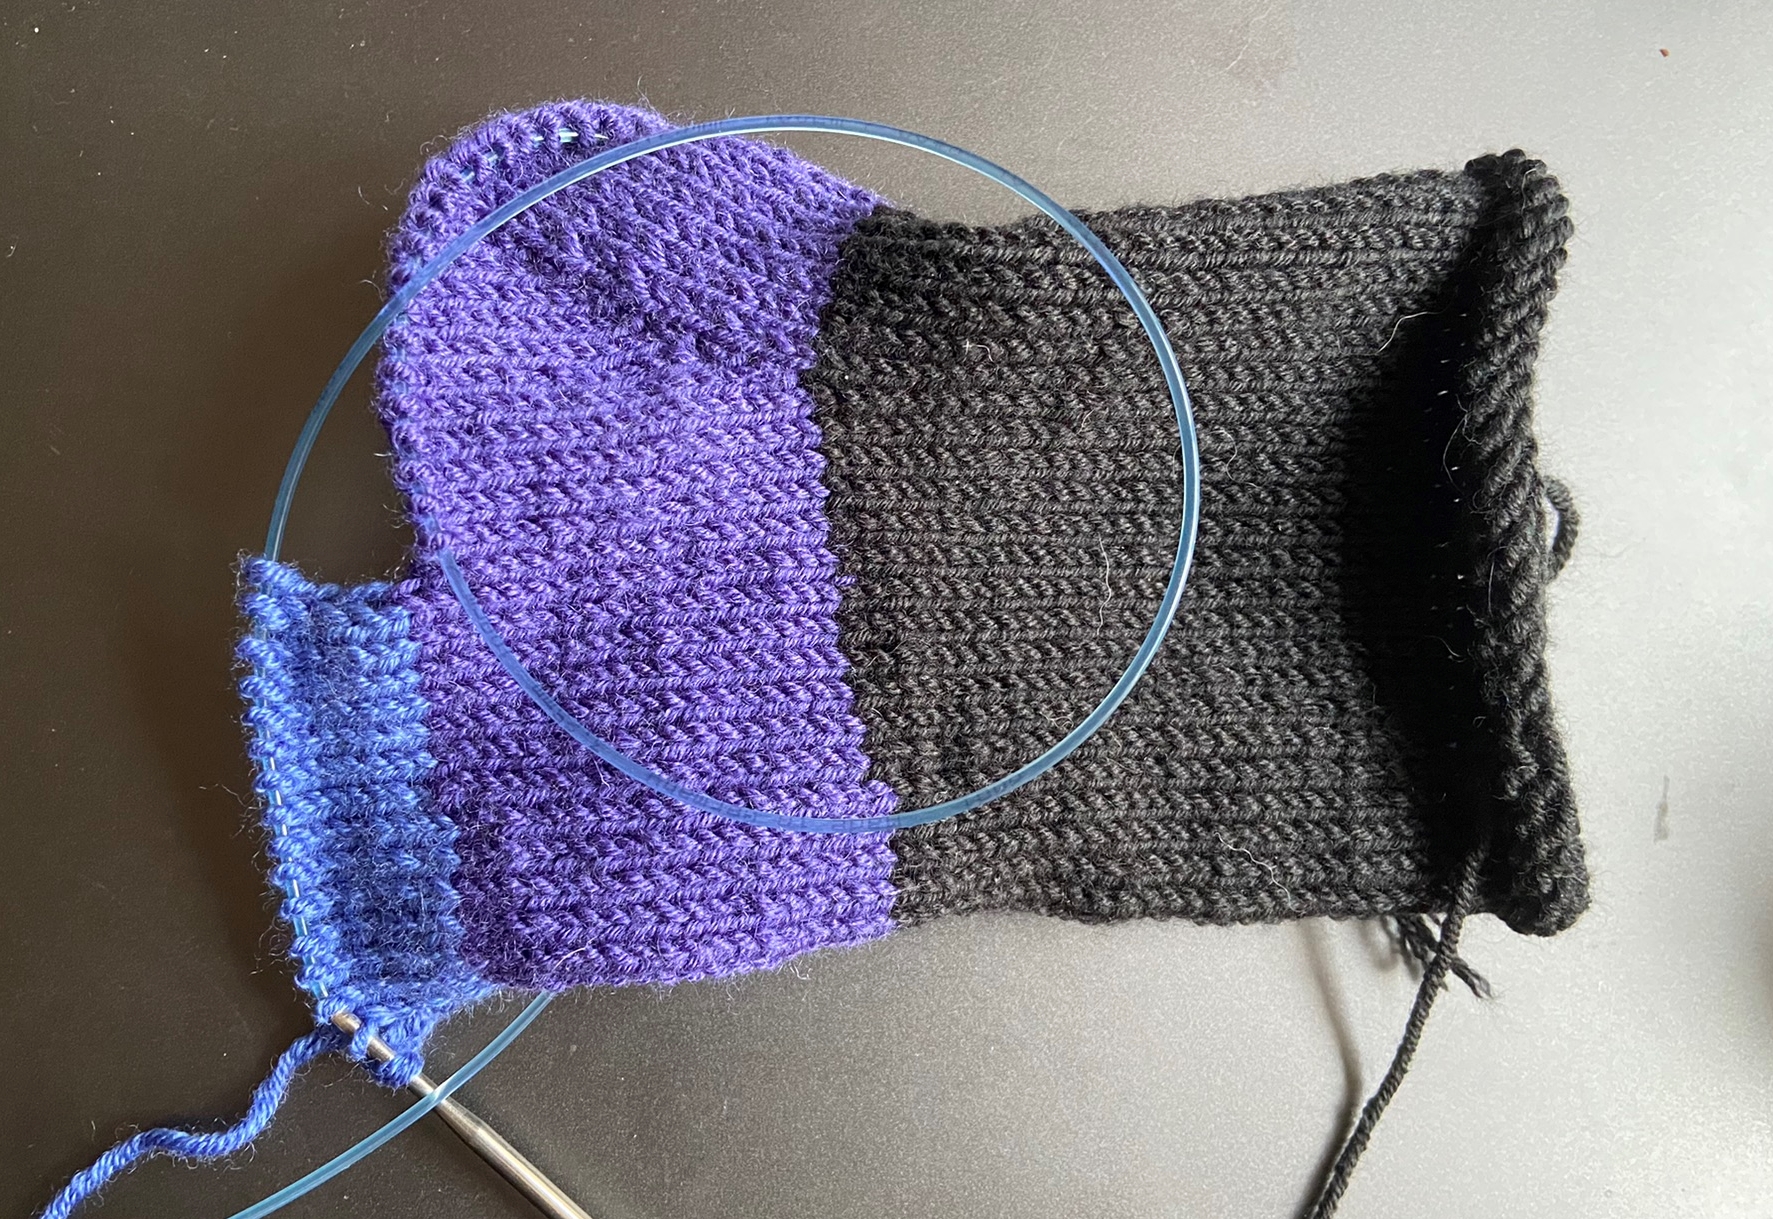
Black: foot. Purple: Gusset. Blue: sole flap.
Work the sole flap back and forth over a total of 8[10, 12, 14, 16] rows. You should be able to count 4[5, 6, 7, 8] sts along each edge of the flap, starting 1 row below the live sts on the needle, up to & including in the last full round below the flap.
For a detailed tutorial on how I pick up and work the edge stitches of a heel flap, please see this companion post on my blog.

3. Work the heel back.

* Pro-tip #1: The ssk and p2tog on this first set of turns will each have a gap if you work them traditionally. See ssk example below. For more details on working these two decreases please visit this post, section 3, "working decreases with picked up sts," which goes into detail on this point.
The image below shows stitches picked up along the R edge of the sole flap (viewed from RS). Note how the sts lean the opposite way from normal. When you purl these sts (from the WS) they will twist in the opposite direction as the sts on the other side of the flap.

Now that you have incorporated the sts along both sides of the sole flap, work back and forth across the heel back, each time ending with an ssk (RS) or p2tog (WS), until you have decreased all the gusset sts you created earlier and you have returned to your original stitch count of 48[56, 64, 72, 80] sts. The heel is now complete and you can resume working in the round.
* Pro-tip #2: To avoid having a gap at the top of the heel back on the right side, after you work the last ssk, continue working around the front of the sock, and work that last decrease as a k2tog from the RS. In the image below, do a k2tog into the first 2 sts on the L needle.

* Pro-tip #3: I always get loose stitches on the left side of my heel back. To help with this, I use the hungry stitch method to tighten up this side. Even after using hungry stitch, I still manually distribute the slack across the rows as needed. In the photo below, the stitches in the lower half of the heel back have been manually adjusted, and those in the upper half have not.


Hello, I'm making a toe up boot (THICK) sock. I have 26 stitches around on my magic loop size 10 needles 13 on top and 13 below my foot. I'm stuck before the gusset. I have no idea what I should be doing for my dutch heel. I'm totally lost. I've read patterns and watched videos.,; still lost. I've made many top down socks. -Nicholette
ReplyDeleteWonderful blog
ReplyDelete